Table of contents
We all are humans and we do make mistakes. Some can be recovered while some can't be. Same way accidentally deleting files can be happened even with an experienced Linux user. Therefore it would be great if the deleted files can be recovered.
NOTE: The following concept and tactics DO NOT apply if you've used shred(or any other data overwriting tool), as it destroys the content of the file rather than deleting.
Fortunately when a file is deleted it does not get removed right away. It just removes the link between the filename and the file, which makes it inaccessible to read (or write or do whatever by a user). Still, the file content is hidden in the file system. Therefore with the right tool you can access them and recover.
However the content will get removed from the file system as you create new files in the system, which makes it harder to find the file. Yet, if you have a crashed file system or a hard drive these tools can be used to recover the files.
Trash
Most of the Linux distributions provide a trash where you can put your unwanted files and recover them whenever you want.
 And for cli users there's
 trash-cli which implements the GUI trashcan.
TestDisk
However trashcan doesn't work if you've use rm, unlink, etc. That's where TestDisk comes into play.
Here's what TestDisk is according to the Wikipedia;
TestDisk is a free and open-source data recovery utility that helps users recover lost partitions or repair corrupted filesystems. TestDisk can collect detailed information about a corrupted drive...
Yes, it can also be used to recover corrupted partitions, but let's focus on recovering deleted files as for this article.

First install TestDisk with a package manager.
sudo pacman -S testdisk
Or get binaries from here. Note that TestDisk can be used on Windows and Mac OS also.
Recovery
I love cat memes, what about you? I have download some cat memes in a directory. Let me show you some.

OOPS! I got deleted everything. What now?
Fortunately I have TestDisk installed on my system. Therefore I'm going to fire it up.
Type testdisk on your terminal and press enter. You will see as below. Create a log file or not, then proceed further.
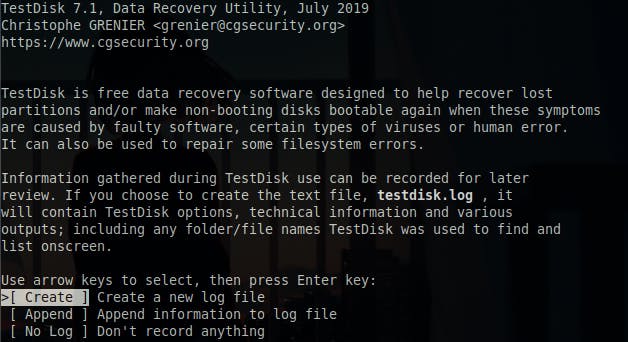
You may prompt for a password and for that let your cat walk on the keyboard. If TestDisk let you in select a device, if not type the password.
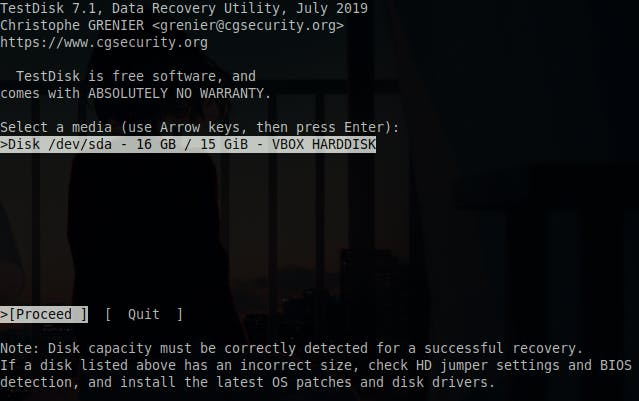
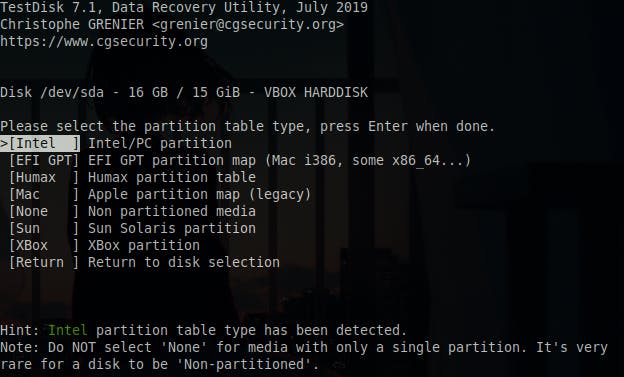
Now, the partition table. Wait... you don't know your partition table? Just use what is selected, TestDisk is smart enough to find it out.
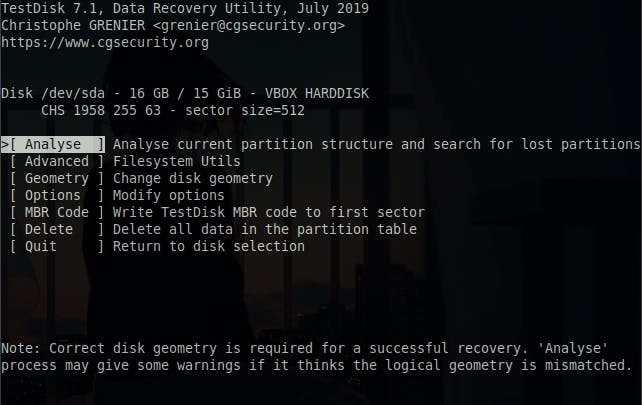
Navigate to Advanced.
Select your partition type. It would be Linux most of the time. And then select List in the list below.
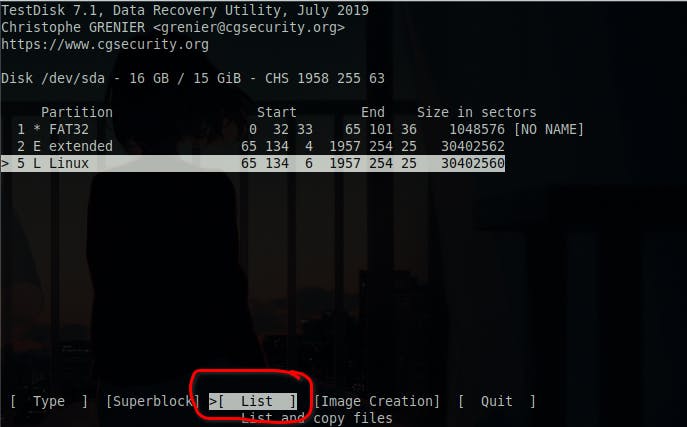
Here you have your directory tree. From there navigate to the dir where the files are deleted. I'm going to search my catMemes dir which is in the Pictures dir.
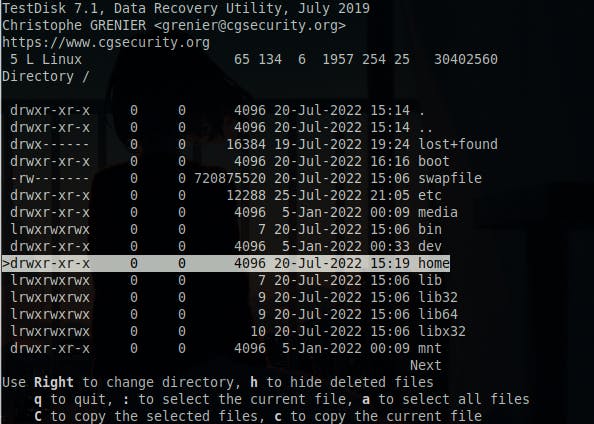
Woah! It's here. Can you see it? This is the whole list I've got deleted. Now as with the instruction below I select everything with a and copy them to a dir.
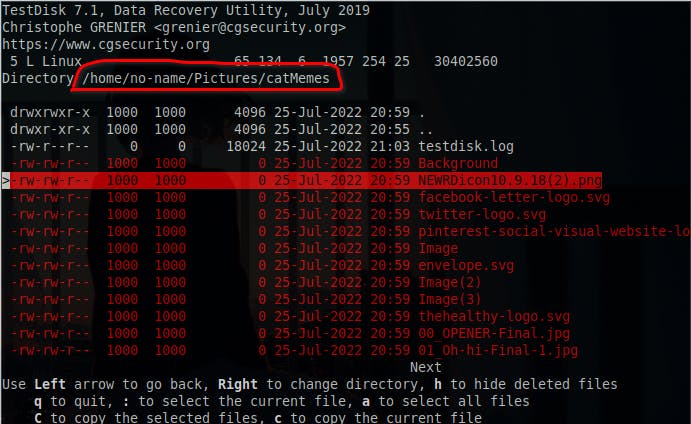
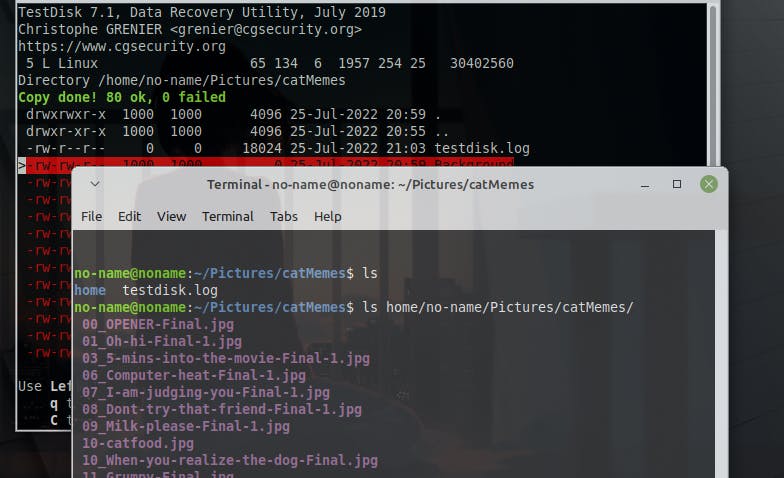
The following will be prompted. From here select what dir you want to put the recovered files.

And press C when the destination is reached and you will have your files copied into that dir.
PhotoRec
Then we have the cousin of TestDisk; PhotoRec. PhotoRec comes with testdisk package, which means if you have the TestDisk utility you should have photorec also.
The only difference between above two is, PhotoRec recovers more files. However the files are not in the original name and lot of unwanted files can be recovered while the process. Therefore if you want to look into a specific file I highly recommend using TestDisk. Still if you have a corrupted or bad hard drive that doesn't let you access files, you can use PhotoRec and recover most of the files.
Go ahead and fire up the command photorec and you'll get something as follows. As it suggests, select a disk to recover and then Proceed.
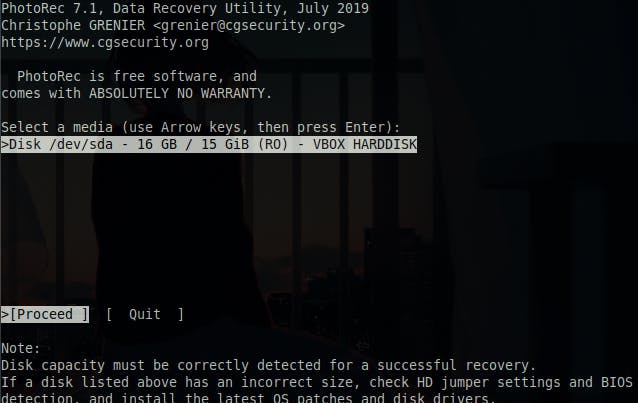
Now select a partition. If you want to recover the whole disk, select No partition, the first one.
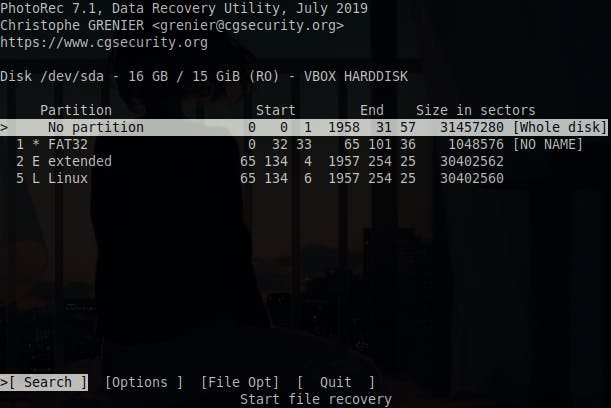
Before selecting a partition, if you go to the File Opt you will see something like this. Here you can select what file type you want to recover. You can tick a file type with the left arrow and untick a one with the right arrow. To exit press Quit.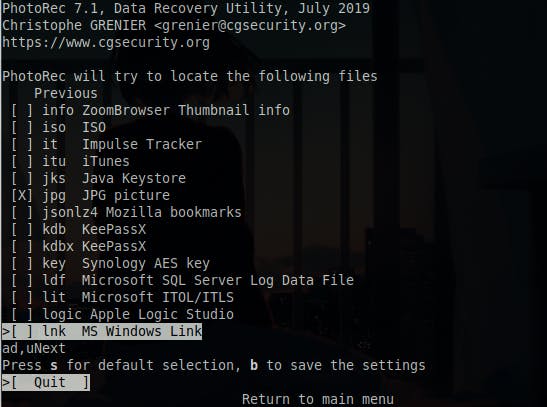
Then select the filesystem type of the partion.

Now you have the directory tree here. Select the directory your files have been stored. Once selected press C to continue.
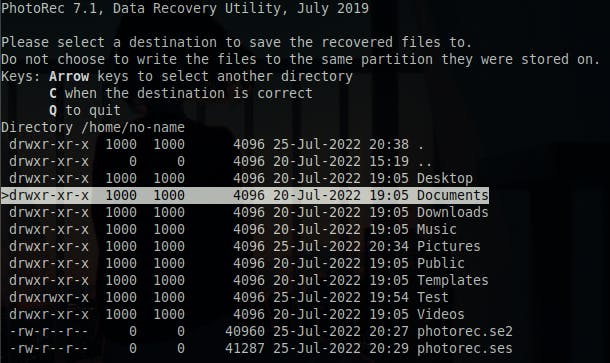
The recovering process has started and you will be able to see the estimated time. If you have a big amount of files then you may have to wait for hours.
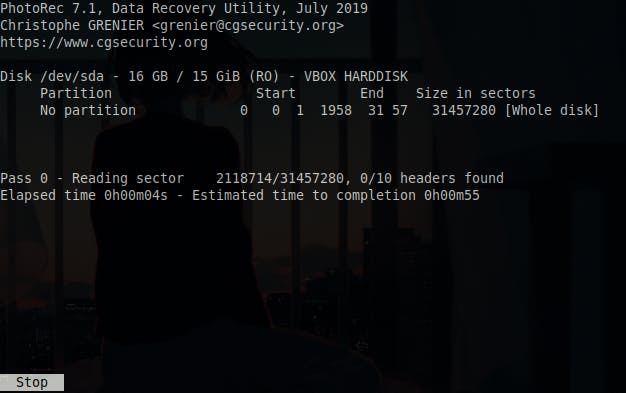
Once completed you'll get the following result. You can access your deleted files within the directory given.
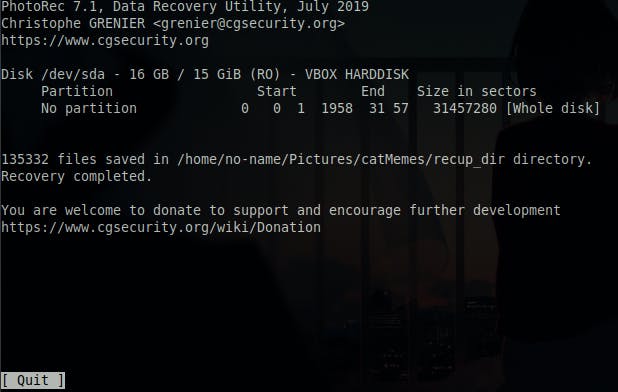
PhotoRec recovers all, whether it is wanted or unwanted. After the recovery you can see a lot of unwelcoming files as below.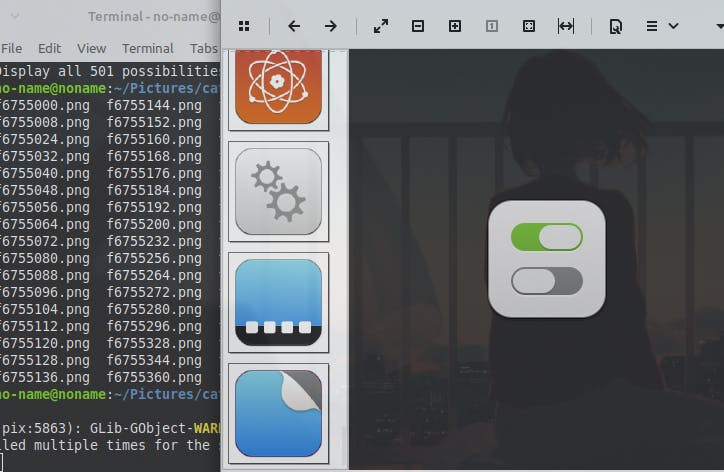
Conclusion
Thank you for reading! Now go and execute sudo rm -rf / --no-preserve-root and make tux happy. Until next time.
If you find this useful let's connect on Twitter, Instagram, dev.to and Hashnode.

